*** Korg states RAM should be installed by a Korg Authorized Service Center ***
*** Installing RAM yourself MAY void your Korg Warranty ***
My other related thread -- Selecting Correct RAM for Korg Kronos Upgrade
http://www.korgforums.com/forum/phpBB2/ ... hp?t=67647
INSTALLATION PROCEDURE (30 minutes)
This describes the procedure on a Kronos 88. The 73 and 61 key models should be similar.
Tools required: Phillips Head screwdriver, RAM, pillows
STEP 00.
While the keyboard is still upright, insert the three cardboard spacers between the front keyboard and the edge of the case. These threee spacers were in place when the Kronos was originally shipped (see Photos below). You may have to tape them so they stay in place. These spacers will make sure the keybed does not shift forward during the RAM installation. The keybed shifting forward (against the metal case) can make some keys stick, so inserting these spacers is important.

Here is a thread about why maintaining sufficient space between the keybed and front metal frame is important:
http://www.korgforums.com/forum/phpBB2/ ... hp?t=64931
STEP 01.
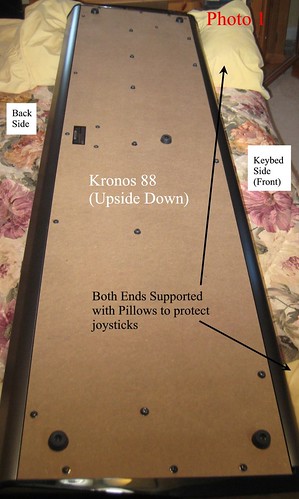
Flip the Kronos 88 upside down on a soft surface (like a bed or couch) and support each end with pillows. Make sure the two joysticks are protected from damage (see Photo 1).
STEP 02.
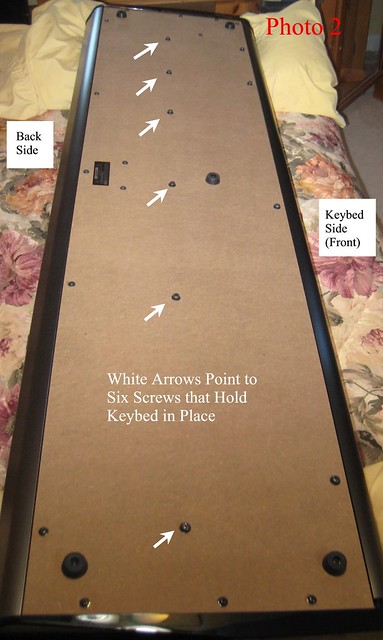
There are a large number of screws on the bottom of the Kronos. The screws around the edges attach the bottom particle board base to the frame of the Kronos. Note the row of six screws that run down the middle (see Photo 2); these screws attach the keybed inside to the particle board base.
STEP 03.
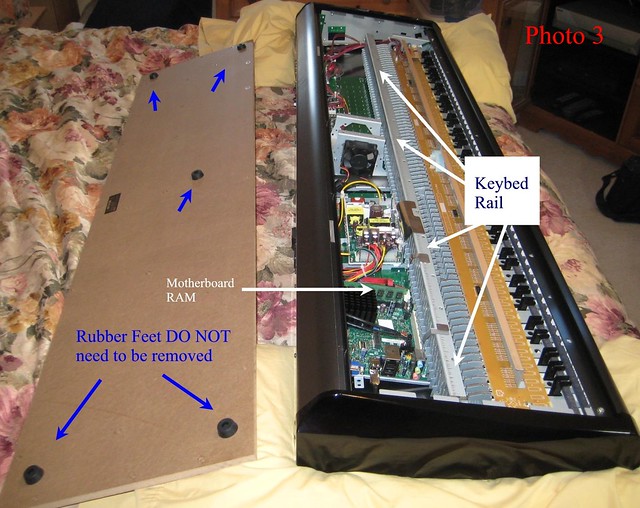
Remove all of the screws (25 of them) on the back of the Kronos 88 EXCEPT the screws holding the rubber feet. Keep all of the screws organized so you can later put them back in the correct original holes. Once the screws are removed, grab onto two of the still-attached rubber feet to lift out the particle board from the Kronos frame. Photo 3 shows the Kronos 88 after the screws have been removed and the particle board base has been removed. Note the location of the Motherboard RAM. Also note the silver metal keybed rail. The middle row of screws in Photo 2 are secured through this silver metal keybed rail, and this is how the keybed mechanism is secured so it does not move.
STEP 04.
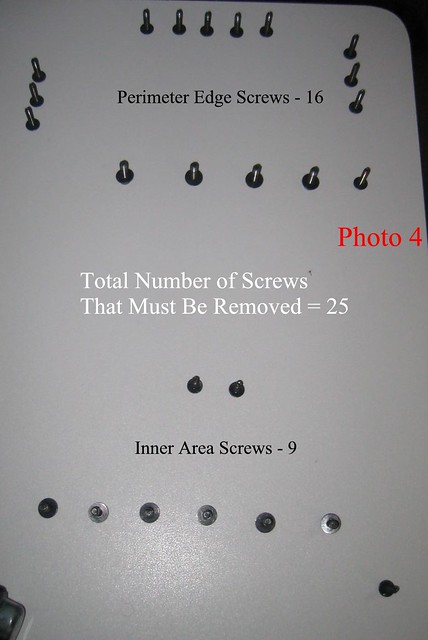
Photo 4 shows my arrangement of the screws on a table so I can later put each screw back in its original location.
STEP 05.
Install the RAM on the motherboard (see Photo 5). Each RAM slot has two white security latches that hold the RAM in place. Push each latch down to allow space for the RAM stick to be inserted. When the RAM stick is inserted properly (press down), each latch will snap back in place. This process is identical to installing RAM on any computer (or RAM in a Triton or OASYS).
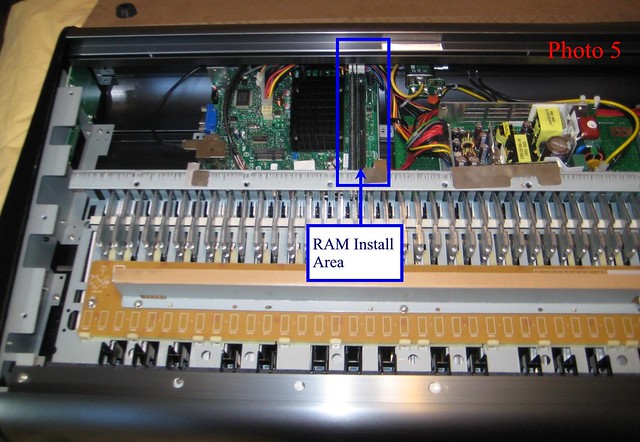
STEP 06.
Photo 6 shows the two RAM sticks after they have been installed. You can also see one of the white security tabs which secure the RAM.
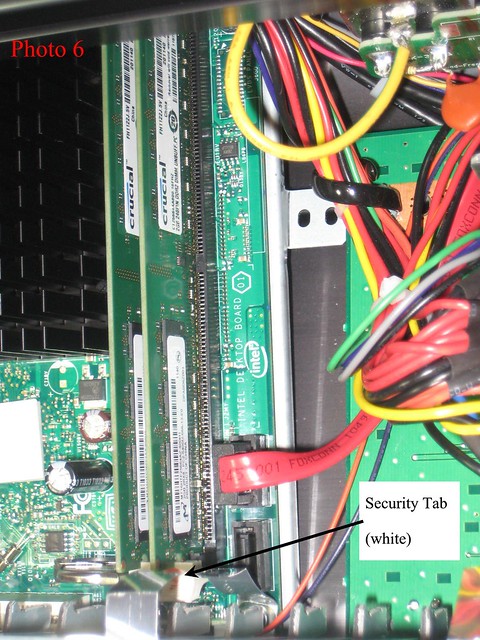
STEP 07.
Place the particle board bottom back on top of the Kronos. LOOK DOWN THROUGH the particle board to make sure you can see the holes are lined up. Make sure the keybed rail is lined up.
STEP 08.
Put all 25 screws back in place. If everything is lined up, the screws should go back fairly easily. Start with the six middle keybed rail screws, making sure they attach to the silver keybed rail underneath. Then put all of the remaining screws back in place.
STEP 09.
You are done. Flip the Kronos back over, power it up and test.
FINAL NOTE:
You can see larger versions of these photos on my Flickr page:
http://www.flickr.com/photos/58215417@N ... 9865/show/


